| Dual
Exhaust Crossmember UPDATED (5/2/02) NEW: Perry at Malibu North has an excellent tech article on how to make your own crossmember similar to the G-force Performance version. If you have the tools and time, you can build it yourself. Go here to see it: http://malibunorth.freeservers.com/CrossFab.html I don't know how many times I have been asked "How do I modify the transmission crossmember for dual Exhaust?". There are a few options to solve the problem of the factory single exhaust transmission crossmember. When I originally started on my Malibu project, I didn't know of any place that made dual exhaust crossmembers for the Malibu's. So, I just modified my existing crossmember. Since then I have heard of a couple of places that offers dual exhaust crossmembers. I haven't dealt with any of these companies, so I can't tell you anything good or bad about them. Also modifying an older Chevelle crossmember has been brought to my attention. Modifying the older Chevelle (early 70's A-body cars), would probably be the easist, strongest and best appearing option if you want to do the modifications yourself. If you have the cash and want to have someone do the work for you, then G-force Performance offers a really nice and STRONG looking crossmember. These guys have a crossmember for about any transmission you would want to run in your Malibu. They are priced at $169, but like I said, they look super tough and look good too.
Maximum Torque Specialties also offers a bolt-in crossmember (p/n: MT54) for G-body applications. I called MTS, to get pricing info and requested a picture of the crossmember. The guy I talked to was very nice and helpful, but unfortunately they do not have a digital picture of the crossmember to post on here. Anyway the price for the crossmember is $189. The guy said that their crossmember is a newly formed crossmember, not a modified version of the original crossmember. If someone has a picture of a MTS crossmember, please send me a copy so I can post it to show what it looks like.
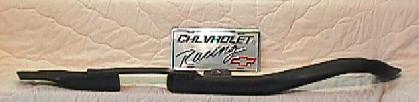
Modifying Your Existing Crossmember I made the modifications myself using a chop saw, and a wire (mig) welder. I am by no means an expert fabricator, but sometimes you just have to make something if it's not available. It is fairly simple, and it can be done yourself if you have access to a welder. I run a 3" exhaust pipe on my Malibu, so you will have plenty of room to run a large diameter tube without it causing a ground clearance problems. Here is a crude explanation on how I did mine so you can do this yourself and save some bucks. 1. If you have long tube headers installed, you can "eyeball" or use a straight-edge from the header collector to the crossmember to determine where the crossmember needs to be clearanced. Otherwise, just determine where the exhaust pipe will travel. On mine, I marked where the exhaust pipe would pass, and decided to give a little extra room on each side. I marked an area aprox. 6" long. 2. Remove the crossmember. I won't go into detail of the steps involved in removing the crossmember, this is something you should know if you are attempting this modification. 3. The best and easiest method to make the cut is with a "chop saw", which looks like a miter saw. You can cut it using other methods, but the chop saw makes a nice clean perpendicular cut. Cut out the section that was marked on the crossmember and chunk it. 4. Get a piece of 3/8" thick flat steel about 3-4" wide and 8" long (if making a 6" clearanced notch as I did). 5. Since you don't have a jig to simulate the locations of the stock crossmember mounting points, you will need to bolt the crossmember back in place, while the tranny is held up with a jack. Try to simulate the exact location of the crossmember, including the installed height of the tranny mount and the stud from the transmission mount will align properly in the crossmember. 6. Take the 3/8" thick flat steel and lay it on top of the crossmember across the 6" area that was cut out. Align and center the piece over the crossmember. Make a few "tack" welds to hold everything in place. Verify that everything is still aligned and in it's proper place. 7. Now, I'm not that great of a welder. I don't do very well with overhead welding, so I removed the crossmember again to make the final welds. 8. After making the final welds on the crossmember and plate, Mine has held up fine for over two years without any problems even under severe dragracing duty. If you want it to look nice, you may want to weld a plate over the open ends of the square crossmember tubing that was cut. The finished product should look similar to this:
Below is a slightly different method to modify the crossmember. The muffler shop performed this modification on Ray's El Camino. Check out his webpage, it is very informative, with tons of technical goodies!
9. Bolt-in the modified crossmember, Run the dual exhaust, and go!
Modifying an Early Chevelle (A-body) Crossmember The great thing about the Early Chevelle (or other early 70's A/G body cars) crossmembers, is that they are already pre-bent for dual exhaust. So, it should be stronger and look much better than the modified g-body crossmember. Unlike the g-body crossmember that bolts-in diagonally, the Early Chevelle crossmember bolts-in straight across the frame rails. So, this will require new holes to be drilled in the frame rails. I have talked with some people that has used this setup. I haven't seen or performed this mod myself, but I will try to explain how this is done from what other people have described. It would be great to have pictures to actually see this crossmember in place. If anybody has pictures, send them to me! 1. Support the rear of the transmission with a jack and remove your old crossmember. 2. Take the Chevelle crossmember and place it where it will be located using the rear transmission mount bolt as a guide. This will allow you to mark the location where the crossmember will mount to the frame rails. Make your measurements from this location. 3. You will need to extend the frame rails on the 83 and earlier A/G-body frames. These cars never came with the OD transmission, so the drivers side frame rail is too short. See the picture below of how it is done on the G-force kit:
4. Now you need to
cut the crossmember to the correct length. There are two ways
perform this step. Here is the first option: b.) The other option would be to cut the crossmember slightly shorter than the distance between the frame rails. Weld some thick (strong) angle iron onto the ends of the crossmember. The angle iron will rest on top of the lower part of the c-section framerail. Weld it so that the height of the crossmember will be the same as the factory crossmember. If you start getting the driveshaft angles "out of whack" it will cause vibration. See picture below:
5. Now that you have the crossmember modified to fit between the framerails, you will need to drill some holes to bolt the crossmember down. I would suggest that you drill the holes into the crossmember first. Drill two holes into each end of the crossmember (or angle iron). Next, place the crossmember up against the bottom side of the frame rail, using the rear transmission mount bolt for alignment purposes. It would be a good idea to use a pair of vice grips or clamps to hold it in place. Use the holes drilled into the crossmember as guide holes to drill into the frame rails. 6. Now put the crossmember in place on top of the frame rails and bolt it down! It looks like it came from the factory that way! |